By: ScionShade
Color correction can be done in moments. It is a simple
and effective way to take your digital images and make them warmer, brighter and
more pleasing to the eye.
This image is straight from the camera and this tutorial will only effect colorization of this image.
We will use "Threshold", "Curves", a little erasing. Finally, for an added punch we'll use PS's "Color Filter".
After doing this process a couple times, an image can be greatly
enhanced in only one to two minutes.
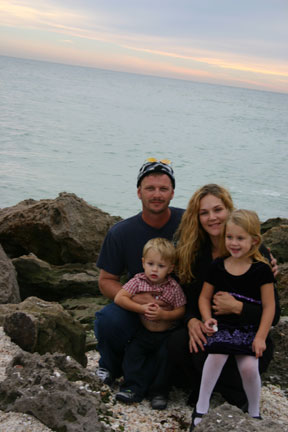
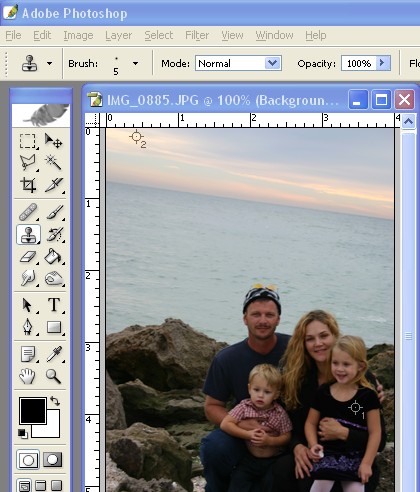
1. Our starting image, in this case My family 
2. a. always duplicate the starting layer,
in case We need it, and something to compare the final product too.
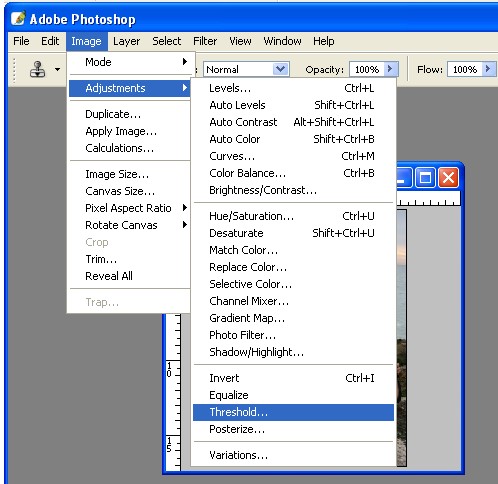
b.now, hit IMAGE>Adjustments>Threshhold.
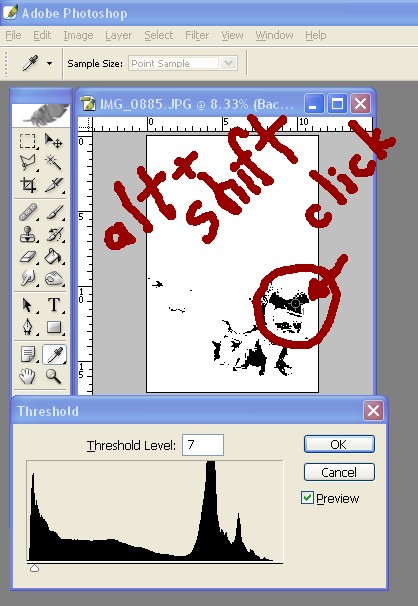
3.a.Now We take that little arrow beneath the graff, and we slide it to the left, until We have areas of black only a few pixels wide.
b.Now we hold Alt=Shift and click on the middle of one of these dark areas.
We will be rewarded with a little marker numbered one.
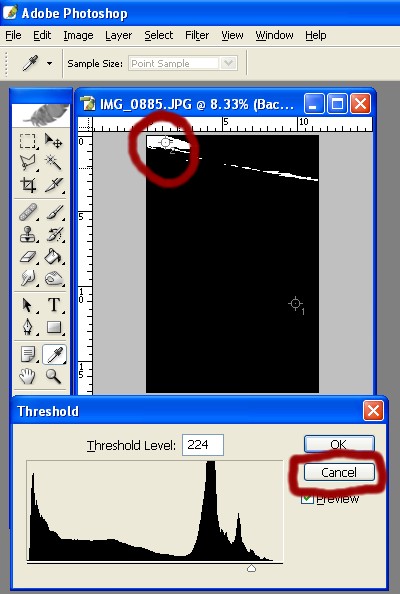
4.a.Now We slide that little arrow beneath the graff and repeat the same process, only this time it will be on a small white area.
b.When that is done, just click  CANCEL. CANCEL.
Now we just have the same image with Our little helpers
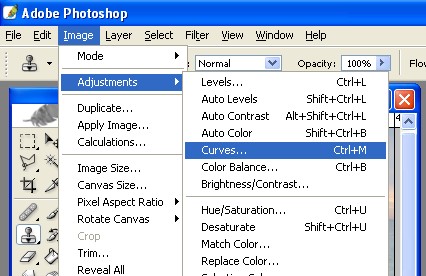
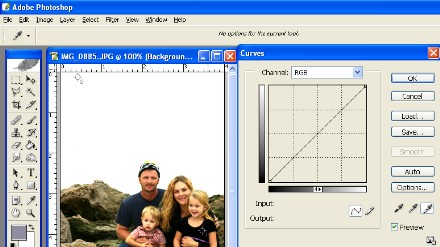
5.Open Curves
6.a.Now we go to the "three little eye-droppers at the bottom left of
"curves" window and SELECT the eye-dropper on the left.
b.Now that we have selected the left eye-dropper we point Our pointer dead center at at the target marked "1", and CLICK on it.
(the color of image may change drastically, no problem, be patient)
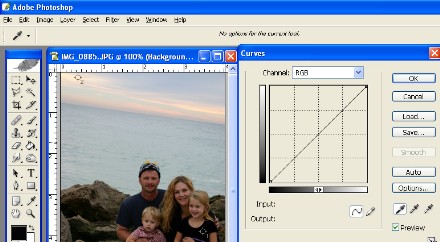
7.a Now We select the "CENTER" eye-dropper.
b. Use the precision pointer and click on the target marked 2.
(the color of image may change drastically, no problem, be patient)
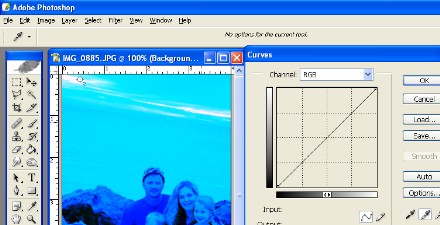
8.a. Now We choose the eye-dropper furthest to the right.
b.Now search your image and find the spot with the least color in the lightest grey area you can find is a great place to start.
Click on that spot, if you like the results choose OK in 'curves' window.
If you do not like the results,click around on other light or bright areas on image till the color looks great to you.
Here I clicked until I liked the color of the people-the sky was totally washed out,
but no problem-click OK.
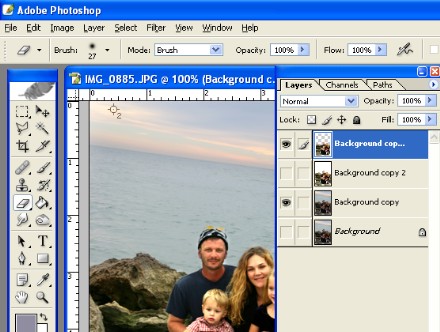
9.Now this part was very simple-I left a lower copy of the original image turned on
in the "layers pallette" and erased that washed out sky.
I used a 13pixel soft brush to erase around rocks and people, now we have the original sky showing.
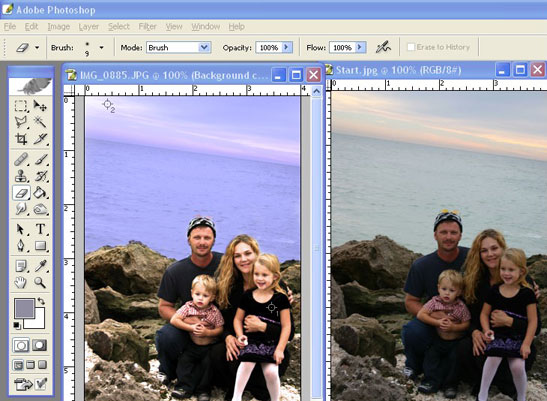
10.Open the "color filter".
This is a very simple little extra step and an overlooked WONDERFUL little filter in PS.
On the layer showing people I chose the first 'warming filter'option,
and on the sky layer I just chose some nice deep blue.

On the layer showing people I chose the first 'warming filter'option,
and on the sky layer I just chose some nice deep blue.
Two minutes from start to finish. I think it's a worthwhile effort.
This was a dark, low color image and if we spent a little time tweeking it, I'm sure we could get it just perfect.
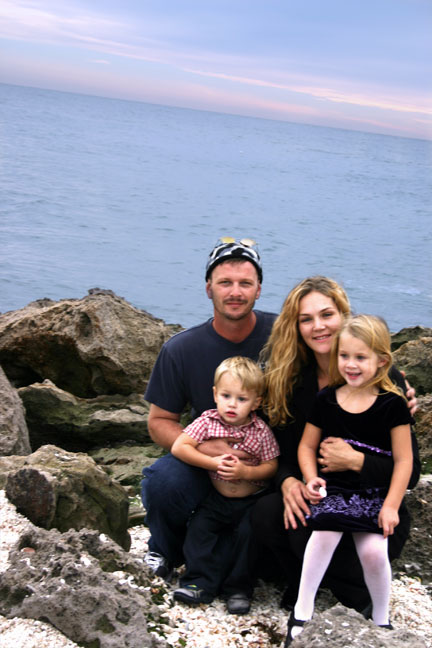
This sure beats just deleting it and losing the shot.
� all photoshop tutorials
|